
start.spring.io is the staple of all new Spring Boot projects, providing the ability to quickly add dependencies and spring starters with just a click of a button. But what would you do if you needed to add a dependency that isn’t available from start.spring.io? Normally you would have to download the Spring project from start.spring.io and add the dependency manually to the project. This presents some significant downsides for an enterprise wishing to standardise version dependencies across its microservices. Today we are going to look at an alternative way to help standardise a project’s dependencies by extending start.spring.io to generate 3rd party dependencies not found on the start.spring.io site.
Spring Initializr, the project which powers start.spring.io, can be summed up from the Spring Initializr documentation
Spring Initializr provides an extensible API to generate JVM-based projects, and to inspect the metadata used to generate projects, for instance to list the available dependencies and versions.
The guys at Pivotal were kind enough to put the source code for Spring Initializr and start.spring.io on Github, which we will be cloning and using here. Once you have cloned start.spring.io you will notice the project consists of three modules:
- start-client: Contains ReactJS components for the UI
- start-site: Java module containing Spring Initializr components
- start-site-verification: Contains verification tests
Adding a new dependency
In this blog post we will be focussing on the start-site module to add additional dependencies. Spring Initializr uses the application.yaml to configure Initializr’s output. Opening up the application.yaml you can see the relevant
information under the initializr property. We are going to extend start.spring.io to allow a user to add CRNK dependencies to the project. If you haven’t used CRNK before I recommend investigating it as a means of standing up basic microservices in a JSON Api compliant way. The CRNK project doesn’t publish the latest releases to
Maven Central, instead it publishes to JCenter meaning we will have to add a custom repository. It also provides a Bill of Materials (BoM) to help manage versioning. We will be using these facets to demonstrate some of the features of Spring Initializr.
Looking under initializr in the application.yaml file already defined for start.spring.io, you can see that it is split up into two main sections:
- env - this contains environment specific options, for example here we can add definitions for BoM, custom remote repositories or specific configurations for build tools
- dependencies - a list of all dependencies that the api will provide
We will be using the env property to add the JCenter repository and the CRNK BoM. Firstly, let’s add the JCenter repository. Under the initializr.env.repositories property add the JCenter repository like so:
1
2
3
4
5
6
initializr:
    env:
      jcenter:
        name: jcenter
        url: https://jcenter.bintray.com/
        snapshotsEnabled: false
Next add the BoM under initializr.env.boms. The latest versions for the CRNK BoM can be found at JCenter. The repository name needs to match the name of the repository defined
in the repositories sections, in this case jcenter.
1
2
3
4
5
6
7
8
initializr:
  env:
    boms:
      crnk:
        groupId: io.crnk
        artifactId: crnk-bom
        version: 3.1.20191113192440
        repository: jcenter
And finally for this to be useful we need to define a dependency that we can select in our extended start.spring.io website
1
2
3
4
5
6
7
8
9
10
11
12
  initializr:
    dependencies:
        - name: CRNK
        content:
            - name: Crnk Spring Boot 2
            id: crnk-spring-boot-2
            description: Providers a JSON API implementation for Spring Boot.
            groupId: io.crnk
            artifactId: crnk-setup-spring-boot2
            starter: false
            bom: crnk
            repository: jcenter
Similar dependencies can be grouped together under the content tab. For example, we could have added another dependency for the CRNK JPA module which would generate another dependency in the website but grouped under the CRNK section. The bom fields tell initializr to add the BoM for CRNK if this dependency is selected. Likewise initializr will add the JCenter repository if the dependency is selected. The starter field needs to be set to false to prevent initializr from removing other selected dependencies.
An example of the above code changes can be found in this commit. Now the configuration has been sorted it’s time to run the project locally to see the results. In the root of the project, run the maven command:
1
./mvnw clean spring-boot:run -pl start-site
Navigate to http://localhost:8080 to check out the updated UI. In the dependency search bar type CRNK and the Crnk Spring Boot dependency should now be visible.
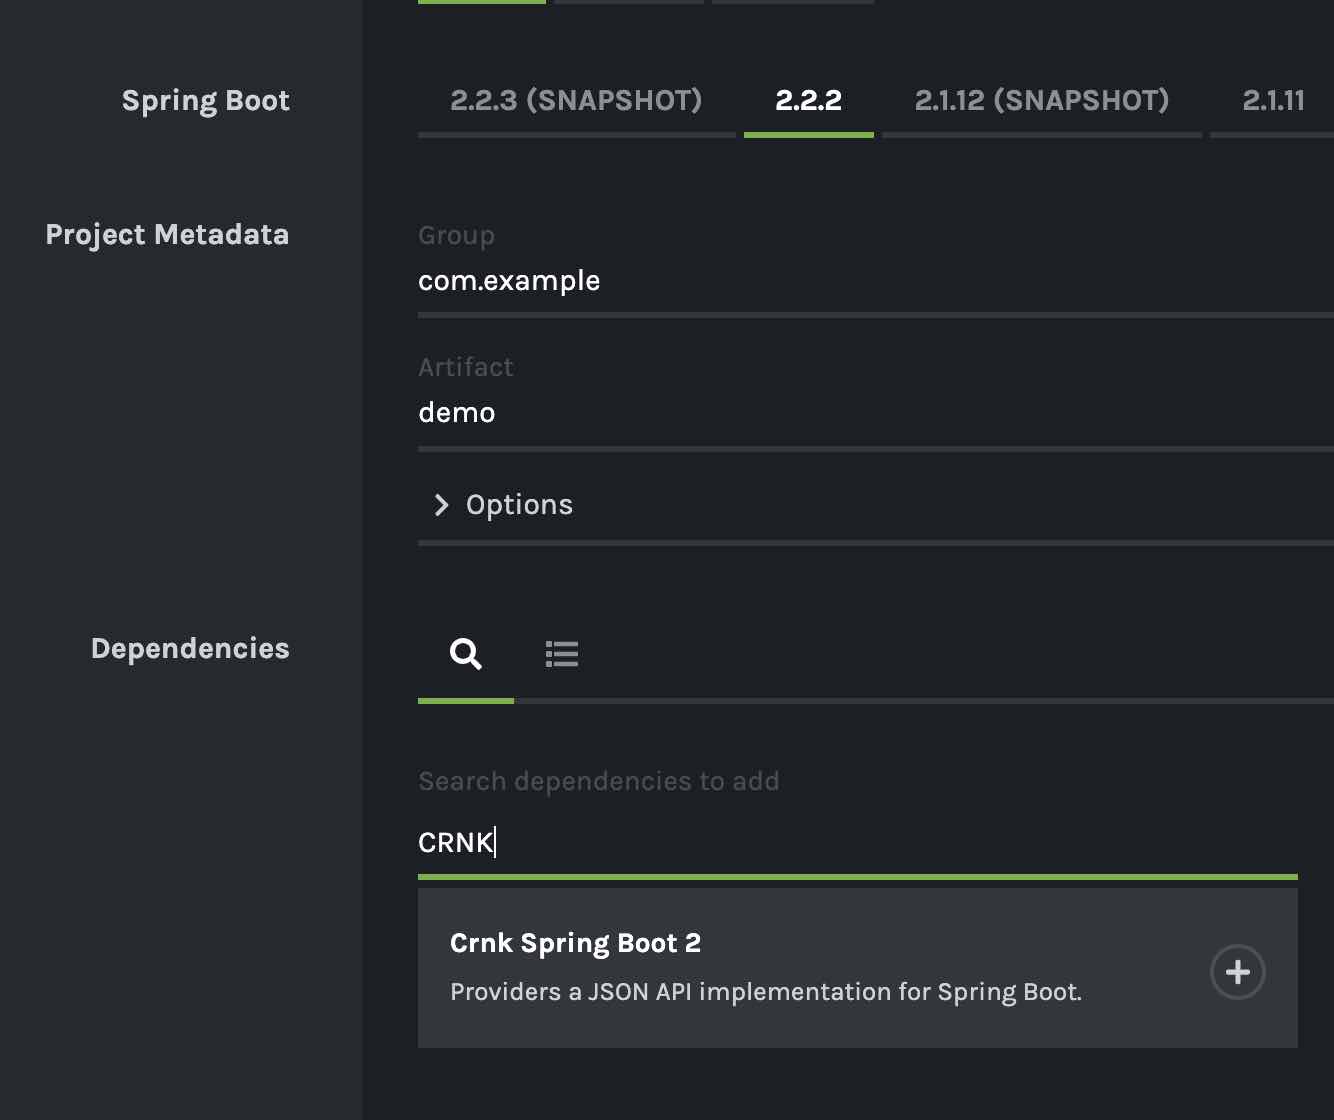
Selecting the CRNK spring boot dependency and clicking the explore button at the bottom of the page shows what the generated project will look like. You should be able to see the CRNK dependency and JCenter in the pom.xml (or build.gradle if you have selected gradle as your build tool). Clicking generate will download the project as a zip file for you.
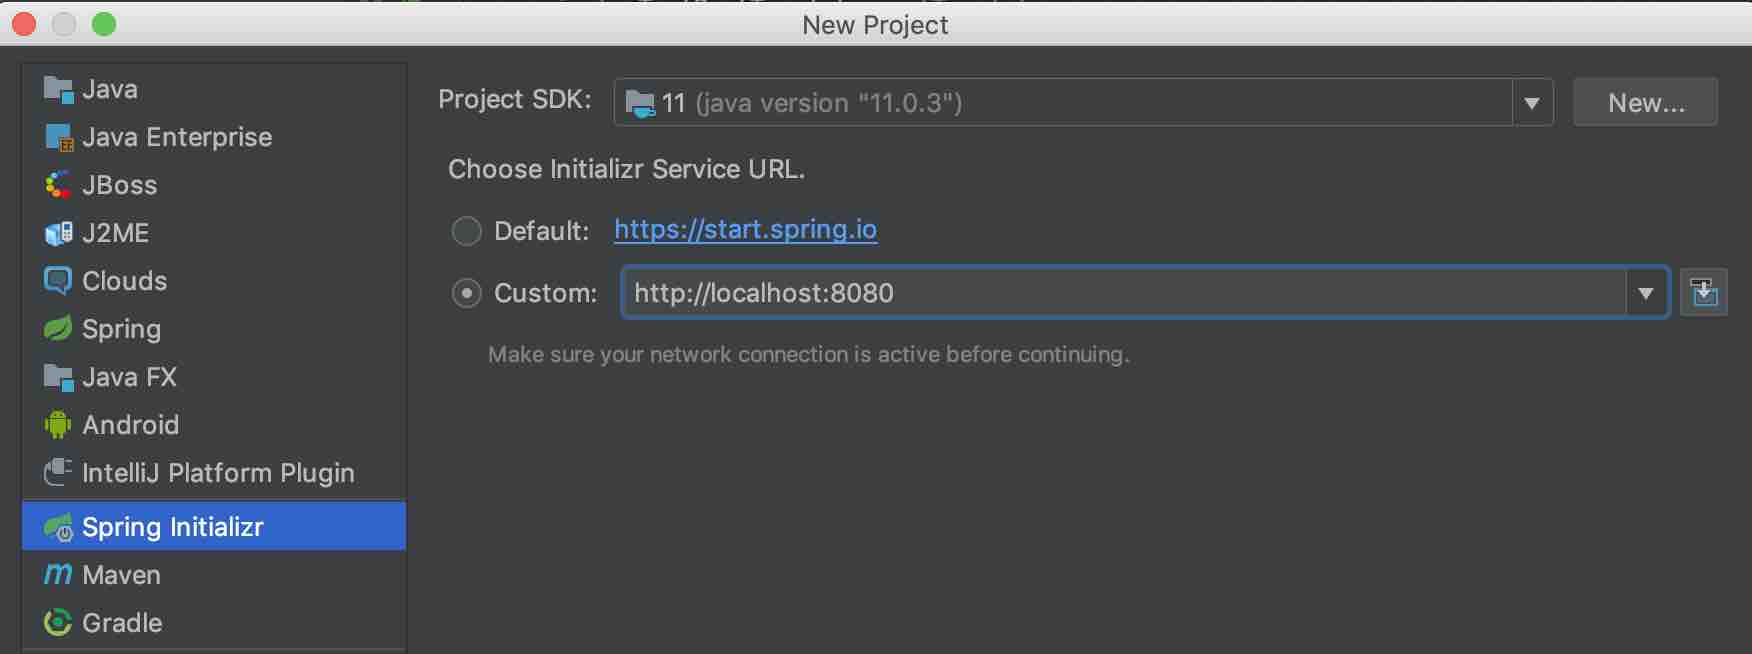
Updating Intellij to use your Initializr
Intellij Ultimate can talk directly to the Initializr api and import the project all within the
Intellij UI. To create a project using the custom Initializr website we have created go to New Project -> Spring Initializr in Intellij and change the Initializr service url to http://localhost:8080
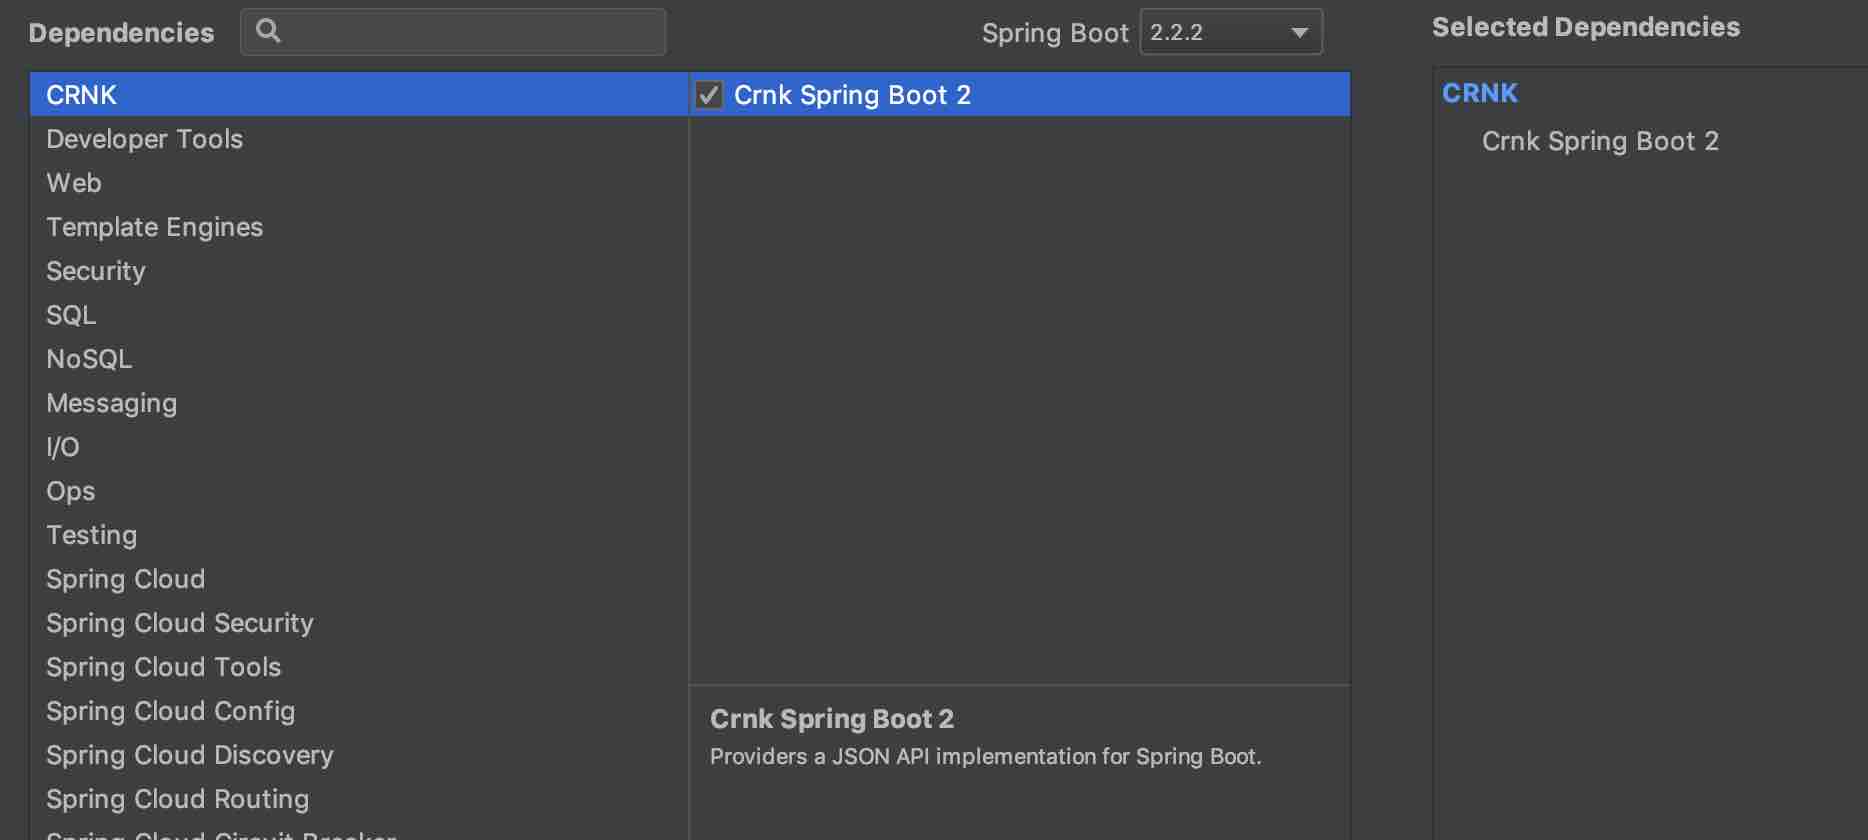
Go through the normal Intellij Spring setup until the dependency selection page appears. Here you should be able to see CRNK as an optional dependency to add
Conclusion
We have looked at extending the start.spring.io website to generate projects using custom dependencies, repositories and Bill of Materials, all with simple additions to the application.yaml file. The Spring Initializr project is very customizable, in a future post we will be looking at generating custom code based on dependency selection.